
Keeping your freezer door seals clean isn’t just about appearances; it’s essential for energy efficiency, food safety and prolonging the life of your appliance. A dirty or mouldy seal can prevent the door from closing properly, leading to frost build-up, wasted energy, and even spoiled food.
Ultimately, the way to clean a freezer door seal is to wipe it down with warm, soapy water and remove any trapped dirt or mould. However, sometimes this simple routine isn’t enough, and a little more work is needed to tackle stubborn mould and ensure it doesn’t return. Alternatively, different freezer types may require a slightly different approach.
In this guide, we’ll explain how to clean a freezer door seal step by step, how to safely remove mould, and the best ways to prevent it from returning. We’ll also cover when cleaning isn’t enough and it’s time to replace your seals. And because not all freezers are the same, we’ll include advice for both chest freezers and upright models, so you can keep every type of seal in top condition.
Why Clean Freezer Door Seals Regularly?
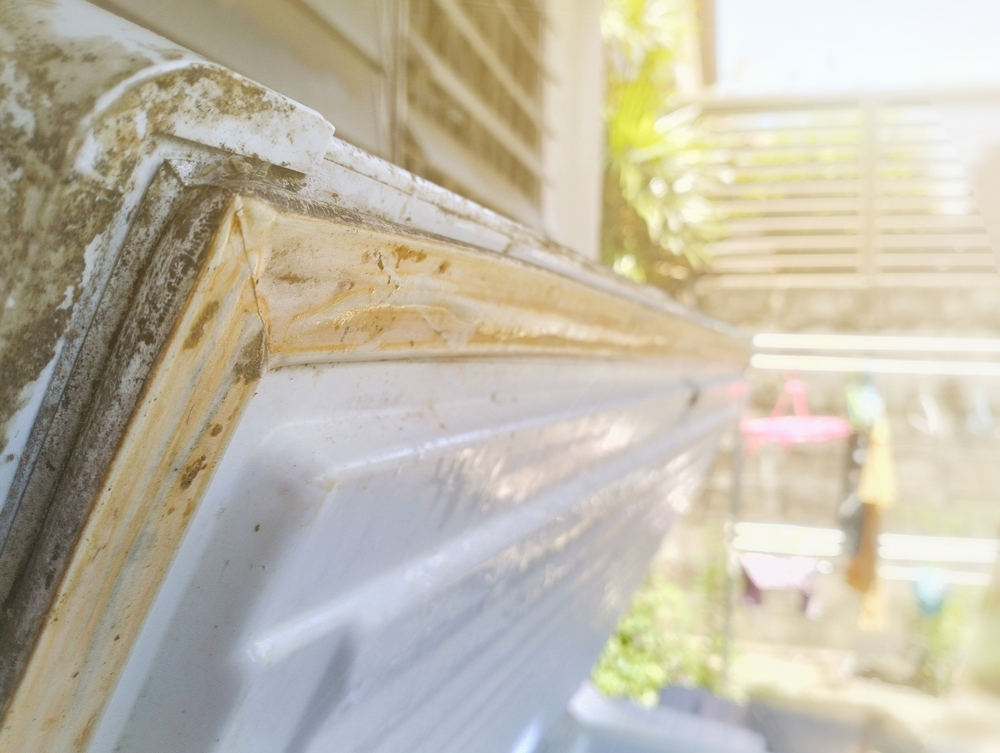
Freezer seals (also called gaskets or rubber seals) are designed to keep cold air in and warm air out. Over time, dirt, food particles, and moisture can build up in the folds of the seal. This creates the perfect environment for mould growth.
If ignored, dirt and grime can accumulate in the folds of the seal and eventually develop into mould, which quickly spreads and compromises hygiene. In commercial settings, this can even result in failed food safety inspections, while at home, it increases the risk of contamination and spoiled food. Regular cleaning removes both dirt and mould, keeping seals flexible and effective.
How to Clean the Rubber Seal on a Freezer Door
The good news is, just like when it comes to cleaning your fridge seals, you don’t need specialist equipment to clean your freezer seals effectively. A simple cleaning routine can be done with everyday items:
What you’ll need:
- Warm water
- Mild washing-up liquid
- Soft cloth or sponge
- Soft-bristled brush (like an old toothbrush)
- Dry towel
Step-by-step method:
- Switch off the freezer (if possible) – For home use, it’s best to turn off the freezer while cleaning. This makes the process safer and prevents warm air from rushing in. In commercial settings where switching off isn’t convenient, focus on cleaning small sections at a time and closing the door between wipes to minimise temperature fluctuations.
- Mix your solution – Use warm water with a small amount of mild detergent.
- Wipe down the seal – Dip a cloth or sponge in the solution and gently clean along the rubber folds.
- Scrub crevices – Use a soft brush to remove dirt from the grooves and corners.
- Dry thoroughly – Moisture encourages mould, so always dry the seal with a towel afterwards.
Tip: Cleaning every few weeks is the most effective way to keep seals in good condition. Cleaning will be required more frequently in commercial settings with increased usage and compliance requirements.
How to Clean Mould Off a Freezer Seal
If you notice black mould spots on your freezer door seal, don’t panic, but act quickly. The longer the mould sits on your freezer seal, the harder it becomes to remove.
The best cleaner for your freezer or fridge seal really depends on the severity of the mould. Below are some safe methods for both domestic and commercial seal cleaning, along with notes on what is and isn’t suitable in a commercial food setting.
Method 1: Baking Soda Paste
- Domestic use: Mix baking soda with a little water to form a paste. Apply to the affected areas, scrub gently with a toothbrush, then wipe clean with warm water and dry.
- Commercial setting: Baking soda is food-safe and non-toxic, making it acceptable for most commercial kitchens.
Method 2: Vinegar Spray
- Domestic use: Mix equal parts white vinegar and water in a spray bottle. Spray directly onto the mould, leave for 5–10 minutes, scrub, rinse and dry.
- Commercial setting: Vinegar is not generally approved as a disinfectant under commercial food hygiene standards. For HACCP compliance, use a food-safe, EN-standard sanitiser instead.
Method 3: Hydrogen Peroxide (for stubborn mould)
- Domestic use: Apply a small amount of 3% hydrogen peroxide to a cloth or cotton bud, dab onto mould patches, leave for 5 minutes, then rinse and dry.
- Commercial setting: Hydrogen peroxide-based cleaners are often approved for food prep areas, provided they are food-grade and used at the right dilution. Always follow your site’s HACCP cleaning schedule.
Method 4: Diluted Bleach Solution (last resort)
- Domestic use: Mix 1 part bleach with 10 parts water. Apply sparingly, rinse thoroughly, and dry to avoid damage to the seal.
- Commercial setting: Chlorine-based cleaning solutions are permitted, but only if they are food-safe, used at the correct dilution, and followed by thorough rinsing with potable water. Many operations prefer commercial sanitisers formulated specifically for kitchen use, as these are less harsh on rubber seals.
Important: Never mix vinegar and bleach. Always wear gloves and ensure good ventilation when cleaning mould.
How to Prevent Mould from Coming Back
Cleaning removes mould temporarily, but prevention is the real key. Here are some habits that make the difference:
- Wipe seals dry after cleaning – moisture is mould’s best friend.
- Check for leaks or damage – a loose or cracked seal lets warm air in, causing condensation and mould growth.
- Defrost regularly – ice build-up traps moisture around the rubber seal.
- Keep seals flexible – rubbing a small amount of petroleum jelly along the edge every few months can help.
- Schedule routine checks – in commercial kitchens, include seal inspections in your cleaning rota. Regular checks are crucial for effectively managing fridge and freezer seals across multiple commercial sites.
How to Clean the Seal on a Deep Freezer
Cleaning the seal on a deep freezer follows the same principles as a standard upright freezer, but the size and orientation can make it trickier. Deep freezers often have larger lids and wider gaskets, which means more surface area for dirt and mould to build up.
Steps to clean a deep freezer seal:
- Switch off the freezer (if possible) – For home use, turn off the unit before cleaning. In commercial settings where this isn’t practical, clean small sections at a time and close the lid between wipes.
- Prepare a mild cleaning solution – Warm water mixed with a little washing-up liquid works well.
- Wipe around the entire gasket – Use a soft cloth or sponge to clean along the folds and corners of the seal. Deep freezer lids are horizontal, so food debris can fall into the grooves more easily.
- Use a soft brush for stubborn dirt – An old toothbrush or a food-safe brush can help loosen build-up in the deeper creases.
- Rinse and dry thoroughly – Always finish by drying with a clean towel to stop moisture from sitting in the folds.
Tip for commercial users: Because deep freezers are opened and closed less frequently, dirt can sit unnoticed for longer. Adding gasket checks to your cleaning rota helps prevent sudden mould growth or odour issues.
When to Replace Freezer Door Seals
Sometimes cleaning won’t be enough. Over time, freezer door seals naturally wear out, and no amount of scrubbing can restore their performance. Look out for the following signs:
- Cracks, splits, or hardened rubber that no longer form a tight seal
- Mould stains that won’t come off, even after deep cleaning
- Freezer doors that no longer seal properly or need to be pushed shut
- Excess frost, ice build-up, or rising energy bills
A damaged seal allows cold air to escape and warm air to seep in. This forces the freezer’s compressor to work harder, driving up electricity costs and putting unnecessary strain on the unit.
The result is reduced efficiency, higher running costs, and a shorter lifespan for the appliance. In commercial environments, it can also lead to food failing to hold at safe storage temperatures, increasing the risk of stock loss and failed hygiene inspections. Because seals are such an essential part of freezer performance and hygiene, keeping them in good condition should be a core element of any food hygiene inspection preparation. [add link to blog 2 once published].
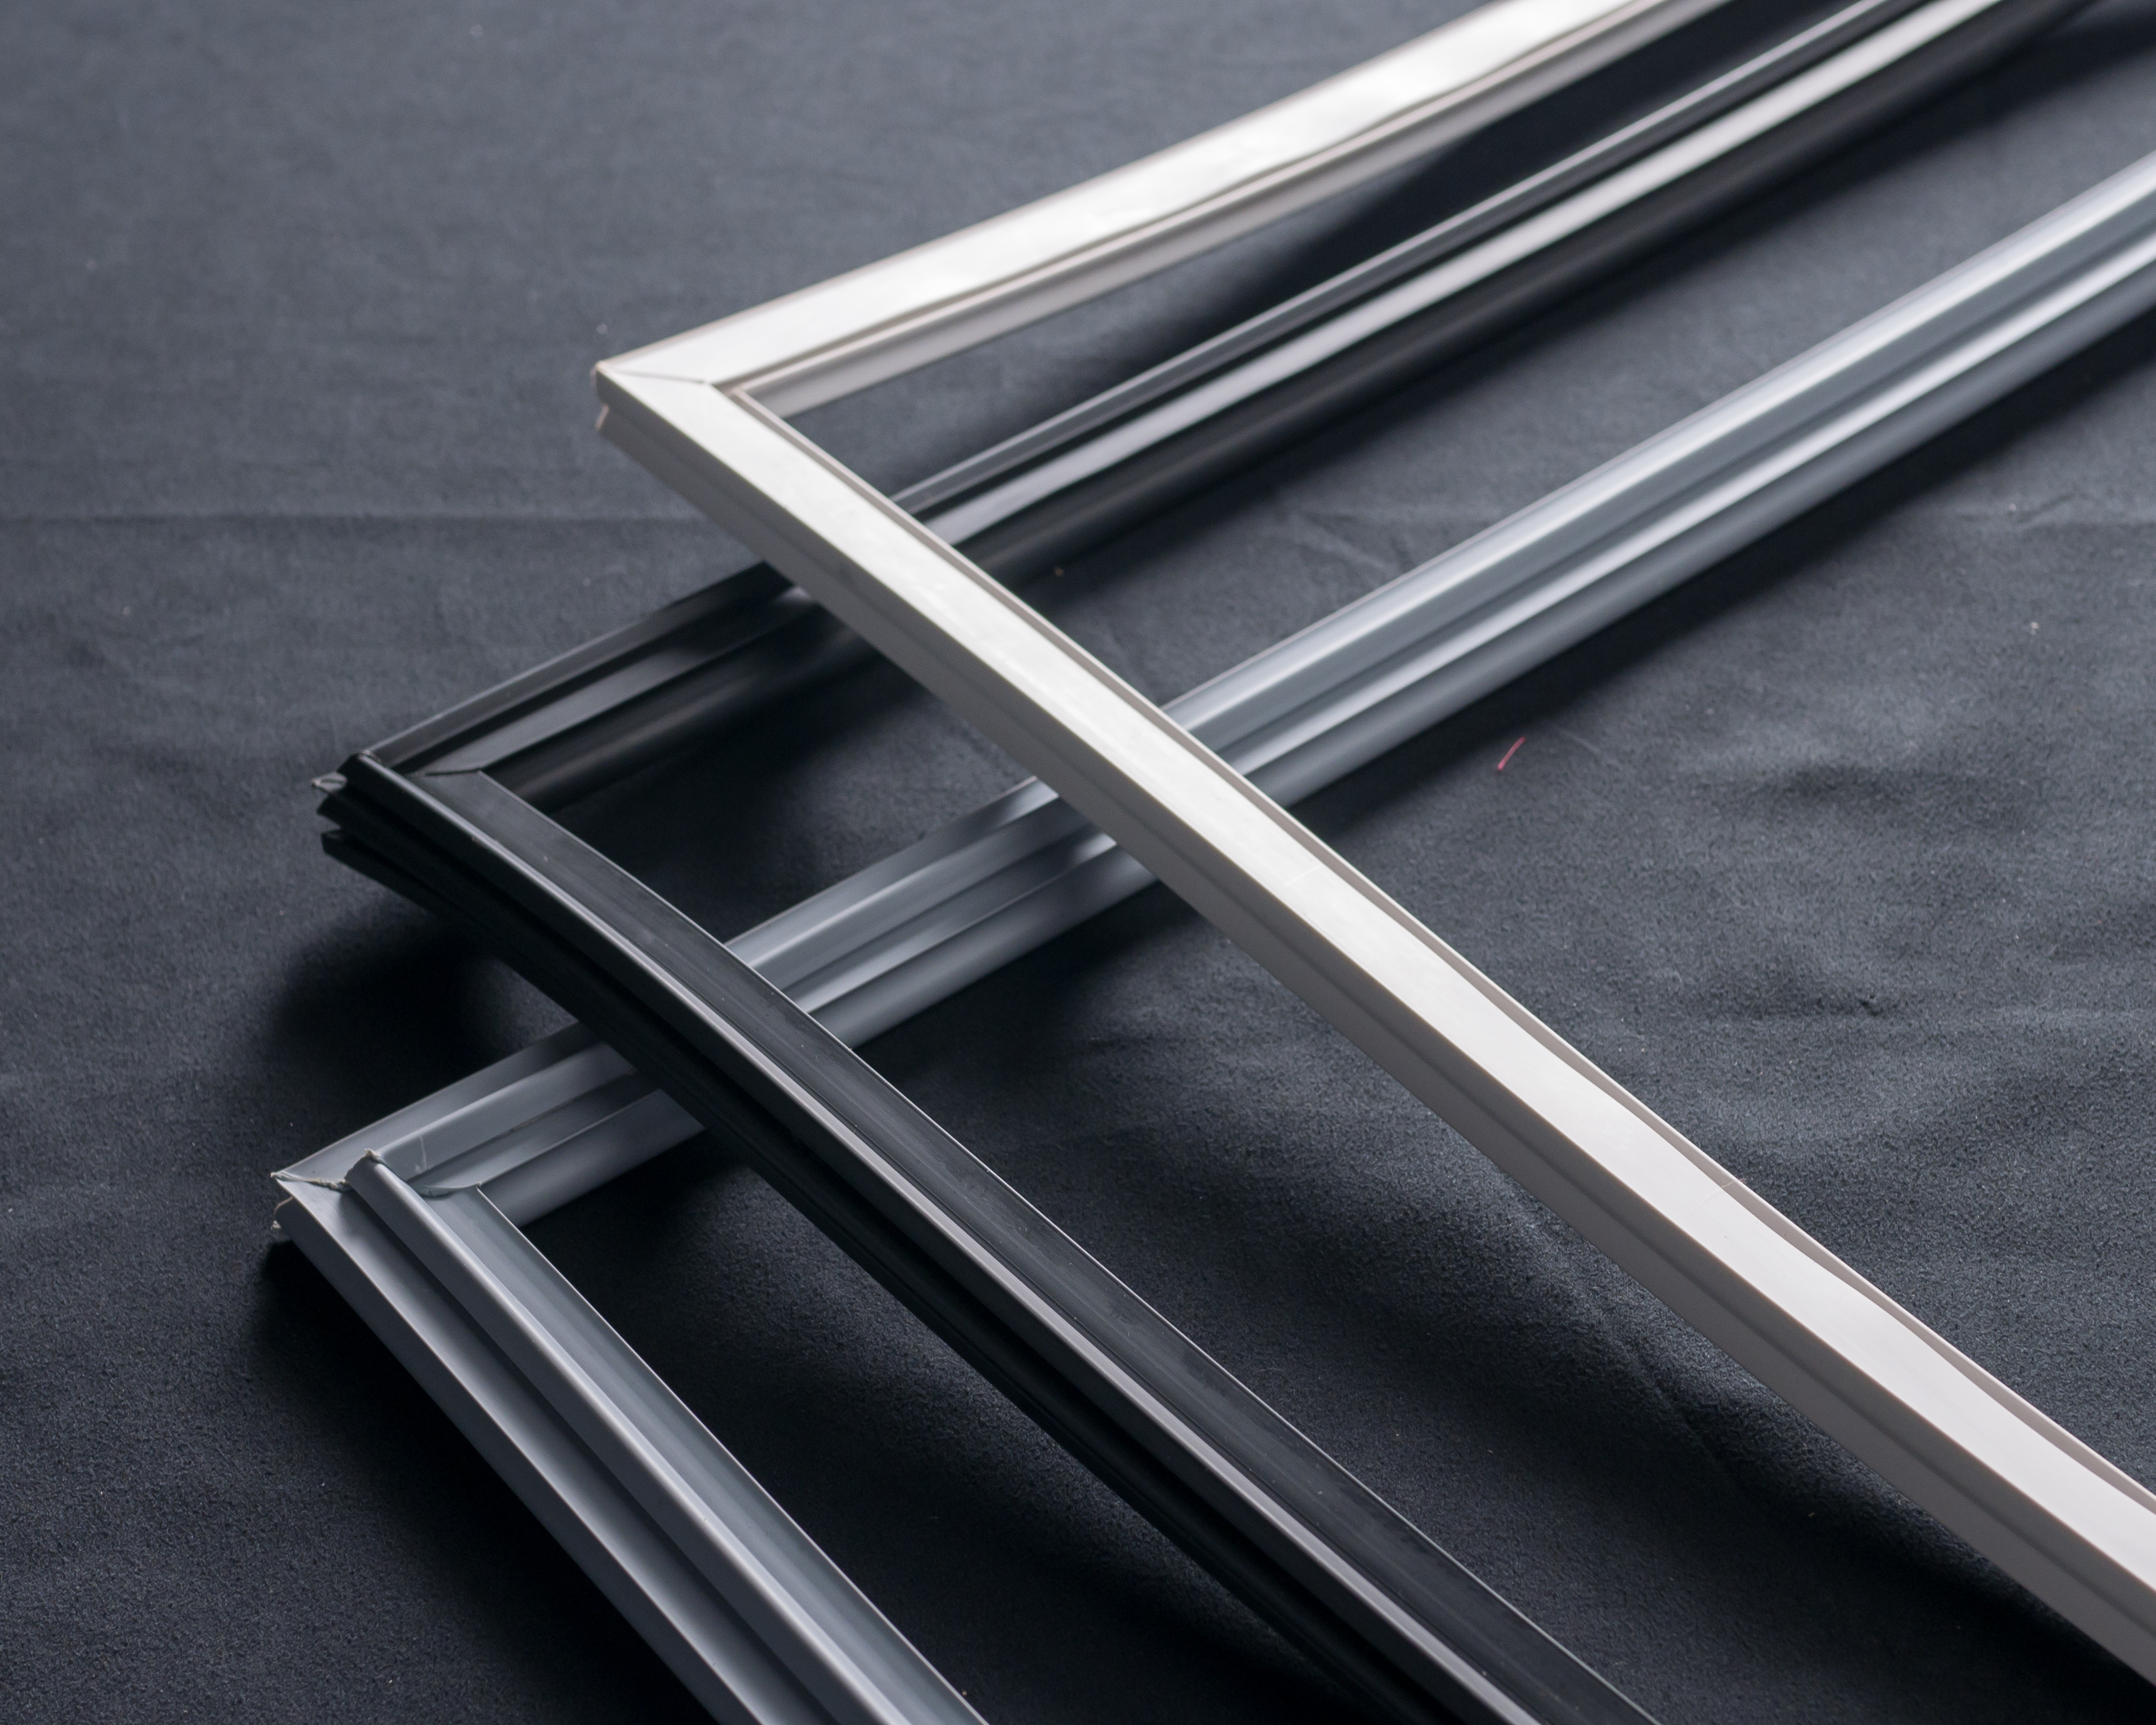
Replacing worn seals quickly restores efficiency, helps prevent ice build-up, mould growth from excess condensation, and keeps your freezer and food at the correct temperature. It also reduces energy consumption and prolongs the working life of your freezer.
Conclusion
Freezer door seals may seem like a small part of your appliance, but they play a vital role in hygiene, efficiency, and performance. Keeping them clean is one of the simplest ways to extend the life of both the seal and the freezer itself. A routine wipe with warm water and mild detergent helps to prevent dirt from building up into mould, while occasional deeper cleans using approved methods keep seals fresh and flexible.
This means lower energy bills, fewer breakdowns, and safer food storage. For commercial kitchens, regular seal maintenance is even more critical, ensuring compliance with hygiene inspections, protecting valuable stock, and keeping cold storage equipment running at peak efficiency.
Of course, cleaning can only go so far. Once a seal is cracked, hardened, or permanently stained, replacement is the only option to restore a proper fit and stop cold air from escaping. In commercial settings, this often needs to be done annually to meet compliance standards.
Investing in high-quality replacement seals saves money in the long run by reducing energy waste, preventing costly repairs, and safeguarding food safety.
Ready to restore your freezer’s performance? Explore our full range of bespoke freezer profiles and branded replacement freezer door seals for top brands, including Polar, Williams, Foster and hundreds more.
If you need assistance, just get in touch with our friendly expert team, who will be pleased to help.
FAQs on Cleaning Freezer Seals
Does mould removal gel work for cleaning mould from freezer seals?
It can, but often household methods like baking soda or hydrogen peroxide are just as effective and safer for rubber seals.
How often should I clean my freezer door seals?
Every 3–4 weeks for domestic use, and weekly in commercial kitchens where hygiene standards are stricter.
Why does mould keep coming back?
Persistent mould is often caused by poor drying, excess condensation, or a failing seal that needs replacing.
How long does a freezer seal last?
In a domestic setting, a freezer door seal will typically last between 5 and 10 years, provided it is cleaned and maintained regularly. In commercial kitchens, however, seals are under much heavier use, doors are opened frequently, cleaning chemicals are stronger, and hygiene checks are stricter. For this reason, seals often need to be replaced every 12 months to maintain efficiency, food safety, and compliance with inspection standards.