You’ll find Williams Refrigeration units across the UK food service industry, from restaurant kitchens to bakeries. Whether it’s a counter or undercounter fridge, a bottle cooler or a coldroom, every unit depends on its door seal to hold temperature. Once that seal starts to fail, cold air escapes, the compressor needs to overcompensate, and running costs go up. If you spot the warning signs early and know how to identify and replace your Williams seal, you can avoid unplanned downtime and keep food safety checks on track.
This guide covers the seal profiles found on Williams equipment, the ranges we make seals for, the common signs of a worn seal, and how to identify, measure and fit a replacement.
Brand Overview
Williams Refrigeration has been making professional refrigeration equipment since 1980. Their head office is in King’s Lynn, Norfolk. Their ranges include refrigerated cabinets and counters, blast chillers, coldrooms, front-of-house display units, and specialist bakery equipment. Their refrigeration units are used in food service, bakery, medical and pharmaceutical settings. Williams used to be part of AGA’s food service division, which was sold to Italy’s Ali Group. Today Williams sits within AFE Group, alongside Polaris and Friulinox, and is one of the Ali Group’s refrigeration brands.
Williams units are built for demanding commercial kitchens. Even so, the door seal will wear and need replacing long before the cabinet itself does. Knowing which seal your unit uses, how to look after it and when it’s time for a new one will help you get the best performance from your Williams equipment.
A Summary of Williams Seal Profiles
Williams has used several seal designs across its models and over the years. Key differences to understand before you order include:
- Dart (push-in) profiles are used on many of the Williams seals we supply. The vast majority of Williams seals we supply use our TSC-2031-D profile, while some Williams bottle coolers use the TSC-2024-D. The dart pushes into a retaining slot in the door. On profiles such as the TSC-2024-D, the dart sits alongside a magnet box that helps the door close firmly against the cabinet.
- Some models have more than one seal version. Williams 2000 units made before 2002 use a different gasket from those made after 2002. Some of their bottle coolers also come in old-style and new-style versions with different gasket numbers. Checking which version you have will prevent you from ordering the wrong seal.
Where to Find a Williams Seal
When a Williams seal fails, you can either source a replacement through Williams and its service partners, or order an OEM-quality seal from a specialist supplier.
At The Seal Company, our dedicated Williams seal range includes over 260 Williams seals. We have one of the largest databases of fridge and freezer seal profiles in the UK, covering over 600 brands. Every seal is made in the UK to OEM standard and can be up to 70% cheaper than buying direct from the manufacturer. All of our Williams seals are available in both black and grey, so you can match your original seal or choose the colour that suits your unit.
Orders placed before 12 pm are manufactured and dispatched the same day for next-day delivery. As clients such as Dean testify, we provide seals with your exact measurements in mind and package them carefully to ensure easy and successful replacement.


Williams Products We Supply Seals For
We manufacture OEM-quality door seals for Williams fridges and freezers across their range, including:
- Opal Series: including the HO2U 2-door counter fridge and the Millennium Opal Series
- Jade Series: including the HJC3-SA 3-door counter fridge
- Onyx Series: including the HCPC5 5-door saladette prep counter
- Crystal Series: including the LC1T single-door bakery freezer cabinet
- Amber: including the A400 and Amber 400
- AZ and Aztra models: including the AZ5CT, AZ10CT and Aztra 5UC
- Bottle coolers: BC1, BC1SS, BC2, BC2SS, BC3 and BC3SS, in old-style and new-style versions where applicable
- Williams 2000: before-2002 and after-2002 versions
- Coldrooms: seals for Williams coldroom doors
If your model isn’t listed, contact us with your model number and seal measurements, and we can make a bespoke seal to fit.
How Williams Seals Wear in Commercial Environments
Every time a door opens and closes, the seal flexes and compresses. In a busy kitchen that happens many times a shift, and over time the material loses its spring.
Wear doesn’t only come from movement. Grease, crumbs and moisture collect in the folds of the gasket. Left there, they can encourage mould and slowly break down the seal material. There are steps you can take to protect against mould, and a quick wipe can make a seal look clean, but neither will undo damage that has already started.
How long a Williams seal lasts depends on how hard the unit works. In commercial kitchens, heavy use and frequent cleaning can mean a seal needs replacing as often as every 6 months, and replacement is typically needed every 6 to 18 months. Checking your seals regularly and replacing them before they fail helps protect compressor efficiency and supports EHO (Environmental Health Officer) inspections and food safety records.
Troubleshooting: Common Williams Seal Issues
Your Williams seal may be degrading if the following symptoms of a damaged seal begin to appear:
| Problem | What It Indicates |
| Unit struggles to hold temperature or runs non-stop | The seal has lost its elasticity, leaving small gaps around the door. Warm air gets in and the compressor has to keep working to compensate. |
| Frost or condensation building up around the door | Warm, moist air is getting past the seal and condensing or freezing on the frame. If frost keeps coming back after cleaning, the seal is likely due for replacement. |
| Splits, cracks or tears in the gasket | Physical damage such as hardened or brittle sections, worn corners, or areas that no longer sit flat against the cabinet. Replace the seal as soon as possible. |
| Door doesn’t close firmly or drifts open | The seal has flattened and lost its grip. Try the paper test: shut the door on a sheet of paper and pull it. If it comes out easily, the seal needs replacing. |
| Mould or black marks on the seal | Moisture and food debris are trapped in the folds, which is a food safety risk. Cleaning may help for a while, but if mould keeps returning, replace the seal. |
Identifying and Measuring Your Williams Seal
Start with your model number. On Williams units, this is usually on the rating plate inside the cabinet. You can use this to search our Williams range, or filter by model to find the matching seal and Williams gasket number.
For models with more than one seal version, such as the Williams 2000 or older and newer bottle coolers, check which version your unit has before ordering. Measuring your existing seal is the easiest way to confirm this.
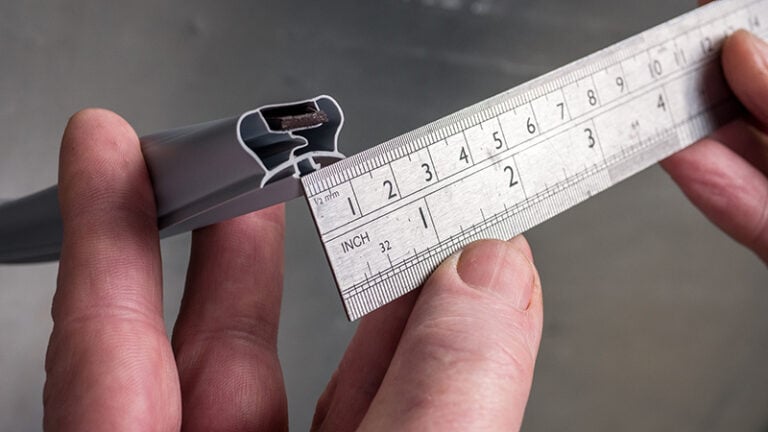
We suggest measuring in millimetres. You can measure in two ways:
- Measure from the outside of the seal on one side to the outside on the opposite side. This works for the vast majority of fridge door seals and is best done while the seal is still fitted to the door.
- For dart (push-in) profiles, you can measure dart-to-dart instead, from the inside edge of the slot on one side to the outside edge of the slot on the other. If the seal is already very damaged or warped, this method can be more accurate.
Measure both the length and the width, and allow for any distortion if the old seal is badly worn.
If your Williams unit is older, discontinued or not listed, we can make a bespoke seal to your measurements. If you’re still unsure which seal you need, our seal ID service can provide expert help.
Replacing Your Williams Seal
Temporary fixes can sometimes cover minor seal problems, but they rarely solve the underlying issue. For food safety and energy efficiency, a proper replacement is usually the better option in a commercial kitchen.
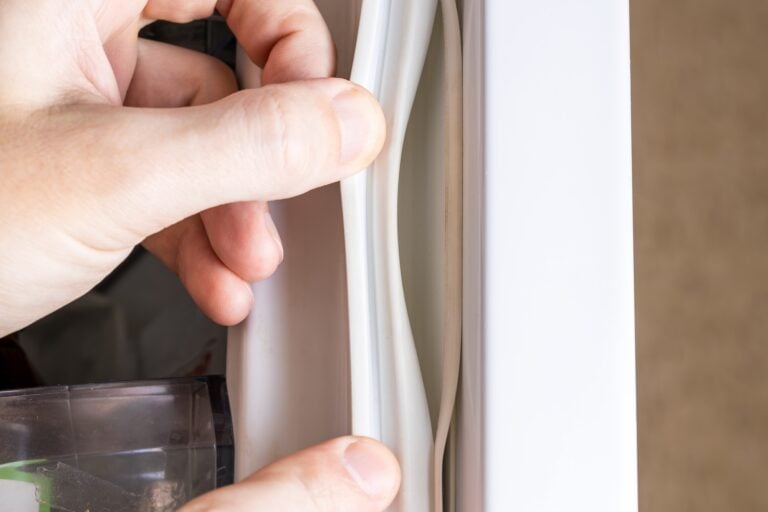
With a dart-profile seal, you remove the old seal from its slot and press the new one in. Watch our video guide to replacing a dart-fixing seal, or follow the steps below.
- Step 1: Prepare
- Lay the new seal flat for a few hours to let any kinks relax.
- Turn off the power and give the unit 1 to 2 hours to warm up. Cold seals are more likely to tear.
- Step 2: Remove the old seal
- Starting at one corner, ease the seal out of its slot, taking care not to damage the channel.
- Step 3: Clean the slot
- Wash the slot with a mild detergent and dry it thoroughly, removing any mould, debris or residue.
- Smooth down any burrs or sharp edges.
- Step 4: Fit the new seal
- Secure the corners first, then work along each side, pressing evenly. Avoid stretching the seal.
- Press any stubborn sections in with a knuckle or blunt tool.
- Step 5: Test
- Close the door and look for gaps or creases. For tips on getting a perfect fit, watch our video. If small gaps remain, gentle heat from a hairdryer can help the seal settle:
- Step 6: Finish with the paper test. Shut the door on a sheet of paper and pull. If there’s firm resistance, the seal is working. If the paper slides out easily, reseat the seal.
- Step 7: Aftercare
- Clean the seal regularly with a mild detergent to prevent mould.
- Include the seal in your routine maintenance checks.
- Make sure it still sits snugly against the cabinet.
When a Refrigeration Engineer May Be Needed
Most operators can fit a new seal themselves, but in some situations a professional is the better choice. Calling one in at the right point saves time, prevents further damage and protects your food safety compliance. Consider this if:
- The door still doesn’t close flush with a new seal fitted. A persistent gap can point to a misaligned door or worn hinges. Even a perfect seal can’t make up for a door that doesn’t sit straight, and the misalignment will wear out each new seal early.
- The unit still can’t hold the correct temperature after a new seal has been fitted. The problem is likely in the refrigeration system itself, such as the compressor, thermostat, airflow inside the cabinet or refrigerant charge. A new seal won’t fix these faults.
- Your unit is still under warranty. Check the warranty terms with Williams or your service provider before fitting a seal yourself, as conditions vary.
Why A Working Fridge Seal Is Important
A failing seal carries several risks for businesses. It can lead to spoiled stock, disrupted service, problems at inspection and lost revenue while you wait for parts. The good news is that replacing a seal is usually quick and simple.
Williams units are built to last, but their door seals will wear with daily use. Keeping an eye out for warning signs and replacing seals promptly protects your food safety record and your bottom line.
The Seal Company provides custom, made-to-order seals for Williams models, often with next-day delivery. We also provide bespoke seals for older, discontinued or non-standard models.
If your Williams fridge or freezer seal needs replacing, start by finding your model number on your unit’s nameplate. Then browse our Williams seal range, filter by your model, and order online. If your model isn’t listed, our team can still provide a bespoke quote.
If you remain unsure of which seal is best for your unit, use our identification guide or contact our experts.